Fossils unit study

Yesterday I posted my list of resources and activities for a unit on the geologic time scale.  Today I am posting my list of ideas for studying fossils with my fourth grader.  

Here is the link to the guide as it appears in my Google Docs: https://docs.google.com/document/d/1xU6dElHs4K1Rmi3tW6vW-F4vUk0lMNZ5eeyRL2QD0dY/edit?usp=sharing

Or, you can read on below:

Fossils


1) Watch the Fossils video on BrainPop.  (approximately 3.5 minutes)  

(We pay $6.99/month to use BrainPop videos on our iPad.  You can also subscribe to the web version.) 


2) Read pages 14-17 of The Usborne Encyclopedia of World History.


3) Watch the Bill Nye video on fossils:  http://www.youtube.com/watch?v=Z4cjYND66J8.


4) Read the book Under Ohio: The Story of Ohio’s Rocks and Fossils.  Pick one of the fossils listed in the book and research it.  Write a paragraph about your chosen fossil and draw a picture of it.  (The DK Eyewitness Fossil book might be a good place to start.)


5) Read pages 114-123 of Basher’s Rocks and MInerals: A Gem of a Book.  Fold a sheet of paper into four squares.  In each square draw a picture or write a description of each of the four types of fossils.


6) Make your own fossil.  http://www.britishcouncil.org/es/make-your-own-fossil-student.pdf (Supplies: a sponge, water, magnesium sulfate, and sand plus a container)


7) Follow the link to play a create-a-fossil game:  http://www.wonderville.ca/asset/fossil-fabricator.


8) Watch this video on petrified wood and petrified forests:  http://www.youtube.com/watch?v=FlMmgglxCss  (Approximately 3.5 minutes)


9) Read the following blog entry about petrified wood and mineral colors: http://www.seriouslyfunnyscience.com/node/68.  Using the information on the blog, draw a colorful picture of some petrified wood and label the bands with what minerals might have been present in the environment around the tree as it permineralized.  


10) Here is a video about the Petrified Forest National Park in Arizona: http://www.youtube.com/watch?v=068GcVD3VaE.  (Approximately 5 minutes long)


11) Read about coprolite:  http://dinosaurs.about.com/od/dailylifeofadinosaur/a/dinosaurpoop.htm.


12) Read the book Jurassic Poop by Jacob Berkowitz.


13) Complete the Who Dung It? activity that you can find described in this PDF: http://www.gvsu.edu/cms3/assets/5FD8F095-BBA0-CAB4-D3330E7F1AD91A19/studentpublicationfiles/importance_of_poop.pdf


14) Watch this How It’s Made video on how replica fossils are made: http://www.amazon.com/footballs-electric-amplifiers-airplane-propellers/dp/B007JF8MRM/ref=sr_1_7?ie=UTF8&qid=1374177179&sr=8-7&keywords=how+it%27s+made  

The video you are looking for is from season 4, episode 3. (Currently free streaming with Amazon Prime)


15) Read pages 62-63 of the DK Eyewitness Fossil book.  Using things you can find around the house, start putting together your own fossil hunting kit.


16) Read pages 16-17 of the DK Eyewitness Fossil book.   These pages talk specifically about fossil folklore.  If you are feeling particularly creative, you can write a little story about someone who finds a fossil that they believe is “good” or “bad” luck.


17) This link leads to tons more information on fossil folklore, how fossils have been  used in medicine and as decoration:  http://www.nhm.ac.uk/nature-online/earth/fossils/fossil-folklore/index.htm


18) Add at least 5 more quiz cards to your trivia game filebox.  Use the DK Eyewitness Fossil book, the Usborne Spotter’s Guide: Rocks and Minerals, or some other fossil book if you need help finding more facts or want to delve deeper.

Unit studies

This summer I have been trying to put together some social studies and science mini-units for the fall that I hope my fourth grader will enjoy.  Last school year we did a huge unit study on rocks and minerals that morphed into a big 4-H project that we completed last month.  Towards the end of the rocks and minerals study, we touched briefly on fossils, so I want to try to continue in that area of science for a while longer and see where it leads us.  

It has been going more slowly than I had hoped, but I have three science topic guides just about finished.  I will try to share them as I finish in case anyone else wants to use them.  The first one is on the geologic time scale.  For each of these I have quite a list of possible books, videos, activities, assignments, etc.  I doubt we will actually do every little thing on my list, but I tend to prefer to be over-prepared in case the topic really piques his interest.  

You can view as a file on Google Docs here: https://docs.google.com/document/d/1qTkzZ57fvhLW1EUOq0bqXc_lMeDWqMCnm2XNWP3zCCo/edit?usp=sharing

Or you can read on below:

Topic 1 – Geologic Time Scale


1) Watch the Geologic Time Scale video on BrainPop.  (approximately 3 minutes)

BrainPop is a subscription resource.  We use it on the iPad for $6.99/month.


2) Read pages 12-13 of The Usborne Encyclopedia of World History.  


3) Read pages 186-187 of The Usborne Encyclopedia of Science.


4) Watch this video on the Geologic Time Scale:

http://www.natgeoeducationvideo.com/film/1032/the-geologic-time-scale. (approximately 3 minutes)


5) Explore this interactive on the Geologic Time Scale:

http://science.nationalgeographic.com/science/prehistoric-world/prehistoric-time-line/. (15+ minutes)


6) Explore the Geotimescale enhanced app on the Kindle Fire.  (15+ minutes)


7) Play “What Came First?”  Directions for the activity can be found midway through the following page:

http://www.ucmp.berkeley.edu/fosrec/ScotchmoorFirst.html.  (Supplies: Index cards, marker)


8) Follow this link to see Geologic Time represented as a clock:  http://www.uky.edu/KGS/education/clockstime.htm.


9) Make a toilet paper roll Geologic Time Scale.  Look at the following links for help: http://www.nthelp.com/eer/HOAtimetp.html  or  http://www.edufy.org/content/show/374

Or use long lengths of colored ribbon:

http://thehomeschoolden.blogspot.com/2010/08/geologic-time-line-activity.html

(Supplies needed: spools of different colored ribbon or toilet paper, marker or pen. A roll of adding machine tape would work as well instead if you can find some at an office supply store.)


10) Make at least 5 quiz cards.  Quiz cards will be used for an end-of-the-year trivia game.  Here are some examples of what you might want to write cards about:


which periods trilobites, dinosaurs, forests, and humans first appeared

which period saw the extinction of the dinosaurs

the name of the current epoch

approximately how old the earth is


(Supplies needed: Index cards, pen, box for storing your finished cards)

You could make the cards on the computer instead and print them out onto cardstock.  


11) Pick one period of geologic time to research. Write a paragraph of at least 5 sentences about it.  Pages 24-101 of The Usborne Encyclopedia of World History should be helpful.  The interactive at the following link could be helpful as well for information: http://archive.fieldmuseum.org/evolvingplanet/interactives.asp  Include a picture or two as well with your report.


Curriculum planning for the upcoming school year

I have a love/hate relationship with curriculum and lesson planning.  On the one hand, I love paging through new curriculum.  I love looking at samples online.  I peruse the various homeschooling forums to read people’s opinions.  I read reviews on Amazon.  I sometimes borrow materials from other moms so that I can give it a really good look over.

On the other hand though, curriculum planning makes me absolutely crazy as there are so many choices; I often have difficulty making up my mind about what to choose.  And even when I find one I really, really like, we sometimes just can’t afford it.  Or, I find something that would really work well for me as mom/teacher but may not necessarily work out so well for my son’s learning style. 

Last year was one of our toughest homeschooling years so far (7+ years now and counting).  The year was fraught with health issues, family issues, a huge, midyear change in my work schedule, a teen with a super busy schedule, etc.  Some days I look back and feel disappointed that we didn’t get more done.  Other days I look back at the past year and realize that we really managed to get a lot done despite all of the ups and downs the last year brought, and that I shouldn’t be so hard on myself.  

Regardless, because of the challenges of this past school year, I am particularly trying to find something for this year that will be a little easier on me this time around, just in case life should intrude.   🙂  Usually I pull together my own materials from all different kinds of resources, but it does take quite a bit of planning ahead which I didn’t always have time for this year.  This year I am looking to see if I can find something that is planned out already that might work for us.  

Earlier this summer, I took a good hard look at Sonlight.  It is a very popular out-of-the-box type curriculum that I have heard a lot of good things about. I find the history readers very appealing.  I read a few from the list for American history this summer and thought they would appeal to my fourth grader.  The instructor’s guides look like they would help keep me on task, even when things on the home front are stressful or busy.  The science seems to include lots of experiments and activities which my son would definitely enjoy.  Unfortunately, Sonlight is pretty expensive.  I have heard that the resale value is good, but it would still be quite a bit to put down for one child for one year of homeschooling.  Perhaps I would feel a little differently if I had two kids close in age who could benefit from doing some if it together or if Tobin wasn’t our last child to homeschool.  

After I moved on from looking at Sonlight, I went back to look again at Moving Beyond the Page.  We tried one unit of Moving Beyond the Page last year.  I had purchased the unit for the novel Tornado by Betsy Byars.  Tobin did enjoy the novel, and he did enjoy some of the activities that came in the unit.  He also felt there was too much writing involved, but then he feels that way about just about everything we try.  We have not tried any of Moving Beyond the Page’s social studies or science units, so I can’t say for certain how those ones would go over.  We may still give one of them a try.  One advantage I can see for using Moving Beyond the Page is that you can purchase each unit separately, so I could spread the cost of the curriculum across the whole school year.  

More recently I have been looking at Time4Learning.  My older son, Stephen, used Time4Learning early on in our homeschooling career, but he quickly moved on from it as he thought it was too easy.  I had not really given it a close look in quite a while.  On Monday I bit the bullet and subscribed to a month of it for Tobin so that we could try it out.  So far he seems to like it all right.  He really enjoys the math and language arts portions, but he gets a little distracted when he works on the science and social studies sections as there are pages to click through for reading, and although he can read higher than grade level, he seems to have trouble focusing when reading longer passages.  I am a little concerned that the science and social studies won’t go as in depth as I would like it, but I plan to continue a little longer to see if I am correct or not.  

There are several things I do like about Time4Learning so far though.  I like that it is $19.99 per month, and that I can cancel at any time.  The parent forums seem to be a great place for finding quick answers when you are having issues.  I also like that their website seems pretty easy for a child to navigate.  We did our second day’s worth of lessons yesterday, and Tobin had no problem logging on and finding where he left off in his lessons.  He is pretty computer savvy anyway, so I don’t foresee him having any problems doing schoolwork on the computer.  

I will update when we have some more experience with Time4Learning under our belts.  

Creamy Vegetable Soup

It’s that time of year when soup sounds like a really good idea. I made a tasty vegetarian soup for Steve and thought I’d write it down to share with others. It’s a pretty flexible recipe. I just use whatever odd veggies I happen to have on hand.

Creamy Vegetable Soup

Ingredients:
1 large onion, chopped
2-3 cloves garlic, minced
1 leek, chopped, white part only
1-2 carrots, peeled and diced
2-3 stalks celery, chopped
3 large potatoes, peeled and diced
1 zucchini, diced
1 bunch broccoli, chopped
water, vegetable broth, or some combination of both * see note below
2 tablespoons butter or olive oil (leave out for a fat free soup)
salt
pepper
1-2 bay leaves

Alternate veggies to add to your soup:
Yellow squash, diced
Parsnip, peeled and diced
Turnip, peeled and diced
Cauliflower, chopped
Corn kernels, fresh or frozen
Sweet potato, peel and diced
Winter squash, peeled and diced
Peas, frozen
Fresh chopped Swiss Chard or Spinach added at the very end shortly before pureeing so you don’t overcook it. If using Swiss Chard, do not include the rib, just the leafy part.

Optional ingredients for a creamier tasting soup:
Milk, heavy cream, yogurt, or sour cream…
We usually bring a container of sour cream to the table, and my family members will add a dollop of sour cream to the bowl if they wish to. Alternately, you could add a bit of heavy cream or milk before you puree the soup with the immersion blender.

Directions:
1) Fill a large soup pot with your chopped vegetables. Add just enough water/vegetable broth to cover your veggies.
2) Add your butter or oil, salt, and pepper and stir.
3) Add your bay leaves to the pot. I try to make sure the leaves are at the top where I can keep an eye on them so I can easily pull them out before blending.
4) Bring soup to a boil.
5) Once the soup is boiling, cover the pot with lid and reduce heat to a simmer.
6) Simmer soup for 10-15 minutes until all the veggies are cooked through.
7) Fish out and discard your bay leaves.
8) Using an immersion blender, puree soup to desire consistency. I purposely leave a few large chunks in my soup. If you don’t have an immersion blender, you can carefully pour the soup into a blender and puree in batches until you reach the desired consistency of your soup.

*Note about liquid: I usually use water and then add a few tablespoons of Vegetable Better than Bullion Base. You can use just water, but broth will make a more flavorful soup. I find that it isn’t necessary to use ALL veggie broth for the liquid since there are so many vegetable being used already.

Math Games: Pig

For the next week or two, I am going to be posting about math games.

First up…PIG!

Enjoy!

Pig
Number of players:
You need at least 2 players. Up to 4 or 5 players can still move along fairly quickly, but for larger numbers of people, you will probably want to find more dice and divide up into smaller groups.

What you need to play:
You will need at least 1 six-sided die, paper, and a pencil or pen. If you are good at mental math, you may not need the paper and writing utensil for the basic game. More than one die is necessary only if you are playing with a larger group of people and want to divide up, or if you want to try one of the variants that requires more dice.

Goal of game:
The goal of the game is to reach 100 points first (or whatever number of points you have determined ahead of time).

Game play:
On a turn, you will repeatedly roll a die until you either decide to stop rolling OR roll a one.

Keep a running total of your dice rolls until you decide to hold. Once you decide to hold, write down your total and pass along the dice to the next player. During subsequent turns you will add to this number, trying to be the first to reach 100. If you roll a one at any time, your turn ends, and you score zero points for that turn.

Scoring Examples:

Player one rolls a five, a four, a three, another three, and then a two and then chooses to stop rolling and passes the dice to the next player. Player one’s score for this turn would be 5+4+3+3+2 which equals 17.

Player two takes up the die and rolls a two, a three, and then rolls a one. Since a one was rolled, play immediately ends for player two, and he scores no points this turn. Poor player two…

Player one takes up the dice again and rolls a five, a five, and then a two before deciding to hold. His score for this turn would be 12 which he would then add to his previous turn’s total of 17 for a grand total of 29. Not too shabby, player one…

End of game:
Game play ends when one player reaches a score of at least 100 points.

Alternate end of game:
A final round is played once one player reaches at least 100 points. All the other players are given one last turn to either tie or top the leader’s score.

Variants:

Variant 1: Make the six the “bad” number instead of the one. This variant would make the addition a little simpler for younger players since you would only be adding up ones through fives.

Variant 2: Roll two dice each turn, instead of one. Dice are added up as in the original game to produce a score; however, with two dice your chances of rolling a one are greater. Once you roll a one on either die, play ends and you score zero.

Variant 3: Roll two dice each turn, instead of one. Dice are added up as in the original game to produce a score. However this time, once you roll a one on a die, that die is retired for the rest of your turn. You can continue rolling with the remaining die until you choose to hold and take your score, or you roll another dreaded one which ends play for that turn and gives you a score of zero.

Variant 4: Roll two dice each turn, instead of one. Dice are added up as in the original game to produce a score. In this variant, double ones rolled are very, very bad, and you lose all of the points you have scored thus far in the game, including points earned from previous turns.

Variant 5: Roll two dice each turn, instead of one. Dice are added up as in the original game to produce a score. However this time, doubles are our friends, even if they are double ones. A single one however will still end your turn and score you a big zero. Points scored for doubles are as follows:

Double ones = 25 points
Double twos = 8 points
Double threes = 12 points
Double fours = 16 points
Double fives = 20 points
Double sixes = 24 points

You probably want to raise the end goal from 100 points to 200 points in this variant to accommodate the possibility of larger points scored in a single roll.

Variant 6: You are given six dice (or as many as you can manage to scrounge up from under the couch) each turn. You can choose to roll as many dice as you wish, keeping in mind that ANY “one” rolled will end your turn, and zero points will be scored for this turn. If you roll three or more ones in a single roll, you lose all of your points scored thus far, including previous turns. If you roll ALL ones in a single throw, you have to give your opponent a foot rub. 🙂

Last swim lesson of the season

Yesterday was the last swim lesson of the season for both boys. The summer lessons at the rec center don’t meet at a time that works for our family, so unless I find an alternative that does fit, they won’t get to resume swim lessons until late September. Tobin will be very sad because he just loved his swim lessons. Stephen on the other hand is very happy they are over because he hasn’t gotten what he’s wanted to out of the lessons the last few sessions.

Steve and Tobin posing before heading into the water for their last swim lesson of the spring

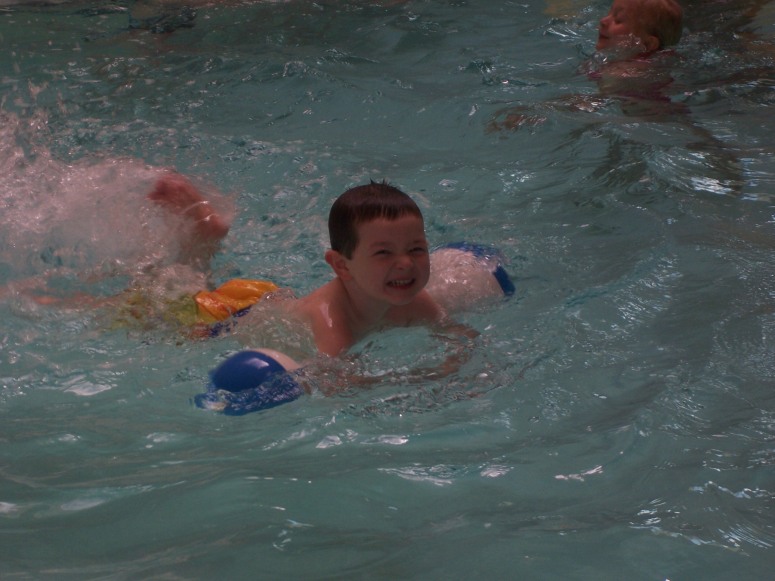
This spring was Tobin’s first time through level 1 classes. He had previously taken baby and preschool classes but those were more water orientation than real beginner swim lessons. Although he hasn’t passed on to level 2 yet, the little guy made quite a bit of progress this session. He learned to float on his back, doggy paddle, and push off from the side of the pool. Unfortunately, Tobin has decided those few skills are enough to qualify as actual swimming, so he tries to practice on his own when the instructors are working with the other kids. This wouldn’t be so bad if it weren’t for the fact that he is too short to stand in the water and still keep his head above water! He appears to have absolutely no fear of the water, so Ken and I spend just about every minute of his swim lessons biting our nails and edging closer and closer to the pool “just in case.”

Blowing kisses to me from the pool

Stephen passed on to level 4 swimming several sessions ago. However, he isn’t interested in learning dives or swimming in deep water, so he has been repeating level 3 which is supposed to be swim stroke development. His person goals for swimming are to build up his stamina and perfect his swim strokes, but the instructor for the current session spent a lot of time having the kids practice diving. For example, today the instructor only had the kids swim two laps in the whole 45 minute class. I don’t think she ever went over any swim strokes other than the front and back stroke all spring long either. Stephen was very disappointed with the whole experience. In the future, I will probably need to arrange for private lessons for him.

Goofing off with dad before class

Another vegetarian soup recipe

Earlier this week, I had a nice conversation with my mother about food. One of the foods she happened to mention was “minest,” or what seems to be more commonly known in the cooking blog world as “minestra.” I haven’t had “minest” in years and years, but as soon as she said the word, I practically started drooling. I have fond memories of sitting in my grandparents’ kitchen, waiting for my grandfather to serve up that steaming bowl of soup for lunch. Lots of parmesan cheese for me, please!

When I asked, my mom listed off the various ingredients she uses when she makes her minest…ham bone to flavor the broth, chopped smoked sausage, assorted greens such as collard greens or endive, etc. As my mother described how she makes her soup, I felt I could practically taste it over the phone, and I couldn’t wait to make my own pot soon. However, Steve is both a vegetarian and my big soup eater in the house, so I knew if I made the minestra exactly as mom suggested, he would miss out. So I tried to think of ways to tweak the recipe so that the soup would both recall those childhood memories of mine and still be vegetarian fare.

Below is the recipe for my first attempt. I swapped out the meat-based broth for veggie broth, of course, and traded out the bits of meat for white beans. For greens I went with dandelion greens because there was a huge, beautiful bunch of them at the grocery store, and escarole because it looked good too. Next time I might try kale and bok choy.

The soup got a thumbs up from three out of four family members. Tobin wouldn’t touch it as the only soup he’ll eat is miso.

Vegetarian Minestra recipe

Ingredients:
Olive oil
1 small onion, finely chopped
2 carrots, sliced
2 stalks of celery, chopped
1 tablespoon minced garlic
32 ounces vegetable broth
1 can cannellini beans, well rinsed
1 can navy beans, well rinsed
½ teaspoon salt
¼ teaspoon pepper
¼ teaspoon thyme
½ teaspoon oregano
½ teaspoon basil
½ teaspoon parsley
¼ teaspoon rosemary
Dandelion leaves, well washed and roughly chopped
Escarole, well washed and roughly chopped
Parmesan cheese, grated

Directions:
1) Drizzle some olive oil in the bottom of a soup pot. Sauté onions, carrots, celery, and garlic in the oil for 2-3 minutes, stirring around to keep vegetables from burning.
2) Pour in vegetable broth.
3) Add both cans of rinsed beans and crush some of the beans against the side of the pot with a spoon. This will give a nice texture to your soup.
4) Add salt, pepper, thyme, oregano, basil, parsley, and rosemary. The amounts are just suggestions. Adjust to your particular tastes.
5) Bring soup to a boil and then turn down heat.
6) Shred dandelion leaves and escarole and add a bit at a time to the pot. If you are fond of greens, add lots of both. Cook until greens are softened.
7) Serve with grated parmesan cheese.

Notes:
1) If you can’t find dandelion or escarole, try other greens such as collard greens, kale, bok choy, etc.
2) For a more filling soup, cook up some small pasta such as ditalini, orzo, elbows, or acini di pepe and add to soup before serving.
3) Serve your soup with a nice salad and some crusty bread. Any leftover, raw greens will be great in the salad.

*Serves four.

It’s still a zoo around here

It’s been a while since I’ve written about our various pets. We did lose one of our pets, our rat Basil, over the long winter but the rest of the furry and scaly critters are doing just fine. Recently, a few of them were kind enough to pose for photos for us…

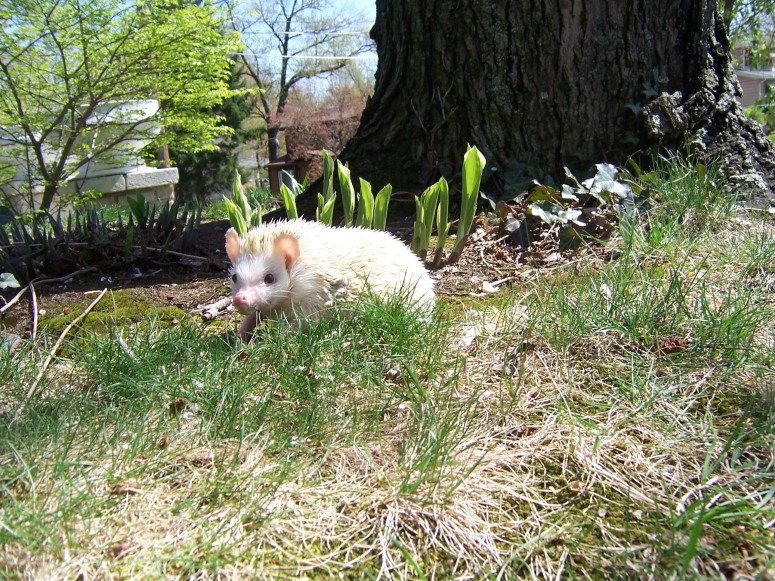
Bean has been very happy now that the weather is warmer. It means he gets to go outside! He scares himself when he shuffles through any dried up old leaves he finds though. Bean hasn’t yet figured out what causes that strange rustling sound.

Bean looking around for bugs to eat

Muppet loves going outdoors too. She loves exploring and rooting around the yard, and always comes back inside in a fine mess.

Muppet enjoying a little sunshine

Achilles is one spoiled gerbil. He knows when Steve comes by he’ll have some kind of tasty treat to give him. Here he’s eating a carrot, but he particularly loves bits of broccoli.

Steve feeding his gerbil Achilles by hand

Salem is the rabbit that Steve got at the county fair last year. The rabbit will be one of the three 4-H projects that Steve plans to do this year. Bean will be heading to the fair again this year too. Hopefully Bean won’t be too jealous that he has to share Steve’s attention with Salem.

Spending some quality time with Salem

Moving “write” along…

Even though we pretty much homeschool all year round, I always think of late April and May as nearing the “end” of the school year. We do some “schooly” activities over the summer, but when the weather is nice or we’re busy, the books get shoved aside in favor of fun in the sun.

I can’t help but think in terms of our school year having a beginning and an end, and I suppose that is no surprise as years of formal education have drilled the idea of the traditional school calendar into my head. At the end of every August, I still look forward to school supply sales and new school subjects to tackle. And at the end of every Spring I tend to analyze what we’ve accomplished for the year, set up goals for the next year, and look forward to moving at a more relaxed pace over the summer.

Since Tobin would be in Kindergarten this year, my goals for him this year were pretty basic. I wanted him to be reading whole books, doing basic math like adding and subtracting, and writing. We did throw in a bit of science and a wee bit of geography too, but I felt that there would be plenty of time for all of that stuff later on. The math and reading came pretty easily and fairly early on in the school year, but writing was a big struggle all year.

The last few months though, I have seen lots of visible improvement in Tobin’s writing skills. He can write his first name beautifully, he is able to write every letter of the alphabet with minimal help, and his numbers are actually starting to look like numbers. What has pleased me the most in his progress though is that he is finally able to draw for pleasure! When he was finally able to purposely draw something recognizable and get excited about it, I breathed a huge sigh of relief. I figured that if he enjoys drawing things, he’ll do it more often and on his own. And if he practices drawing more often, his motor skills will improve and the rest of his writing skills will hopefully fall right into place.

Tobin begins drawing a picture of his family.

Tobin draws his mom, dad, himself, and his two brothers

Tobin was so proud of his picture of his family that he wanted his dad to tape it up in his bedroom. Unfortunately, before they had a chance to put the picture up, Steve did something to annoy Tobin, so he crossed Steve out of the picture…sigh. Maybe Steve will get to stay in the next drawing…

I love Cauliflower

Mark Twain once described cauliflower as, “nothing but cabbage with a college education.” Obviously Mr. Twain did not properly appreciate cauliflower, but then he probably wasn’t eating it the right way. In our house, our favorite way to eat that wonderful vegetable is as a cauliflower patty, or fritter, if you will.

My mother used to make cauliflower patties for us all the time. It was always a treat that I looked forward to. I have vivid memories of trying to patiently wait for the next batch to be out of the fry pan and ready to gobble down. It was probably nearly impossible for my mom to cook them as fast as my brothers and I could eat them.

My mom always fried hers in oil, and I really miss eating them that way. However ever since I had my gall bladder out, fried foods and I are no longer friends, so I stick to using cooking spray instead. If you decide to fry them in oil, please remember to eat one for me.

Cauliflower Patties Recipe

Ingredients:

2 cups cauliflower broken into small pieces
1 cup of flour
1 tablespoon finely chopped onion (optional)
¼ teaspoon pepper
½ teaspoon salt
1 teaspoon basil
1 teaspoon parsley
1 teaspoon oregano
1 teaspoon minced garlic
2 eggs
½ cooking liquid saved from cooking cauliflower (could also use milk)
1 cup shredded/grated cheese (sharp cheddar, Colby, mozzarella, parmesan, etc. or some combination of cheeses)
Olive oil for frying (or cooking spray if you’re trying to keep it lower fat)

Directions:

1) Break fresh cauliflower into small pieces and put into a small saucepan. Add enough water to cover cauliflower pieces and boil until tender. DO NOT DRAIN WATER.
2) Using a slotted spoon, remove cooked cauliflower pieces to a medium sized mixing bowl. Set cooking water aside for later. Allow cauliflower to cool a bit.
3) When cauliflower is cooled a bit, add flour, onions if using, salt, pepper, herbs, garlic, and eggs to bowl and combine.
4) Add ½ cup of saved cooking liquid to create a batter the consistency of pancake batter. If desired, use milk instead of cooking liquid.
5) Mix shredded/grated cheese into the batter.
6) Heat olive oil in a fry pan over medium heat or spray pan with cooking oil.
7) When oil is hot, carefully drop ¼ cup pools of batter into pan. (I can usually make 2-3 patties at a time in my fry pan.) Cook patties for 4-5 minutes, about 2 minutes or so per side. If frying patties in oil, move cooked patties to a paper towel lined plate to drain excess oil. If using cooking spray, the paper towels are unnecessary. (The fried ones taste best, but they are probably healthier without all the oil.)

Serving suggestions:

1) I usually serve mine with plenty of salt and pepper.
2) Try serving with marinara sauce for dipping.

Notes:

1) If you don’t like cauliflower, try using shredded zucchini in the batter instead. If using zucchini, I normally increase the amount of onion I use with it. Broccoflower is a good substitute as well if you are lucky enough to find some in your local grocery store. I can never seem to find it when I am specifically looking for it.
2) Leftover cooked patties warm up pretty well the next day.

* Batter makes about 10 cauliflower patties.